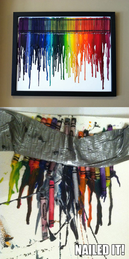
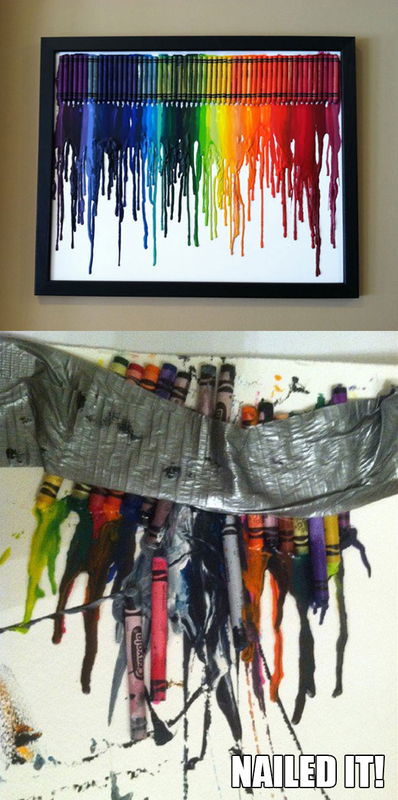
We have all seen those crafts on Pinterest and been guilty for creating one of those well known 'Pinstrosities'. Melted crayon art used to be one of my biggest, most common Pinterest fails because I always wanted to let the kidlets help with the actvity and it would never turn out quite right. So I have gone to the drawing board and come up with a list of new twists on the old trick and am here to share them with you week by week I will count down my favorite ways to do crayon melting that is kid friendly and far less likely to result in another 'Pinstrosity'. Today I am sharing a 'splattered' version of melted crayon art.
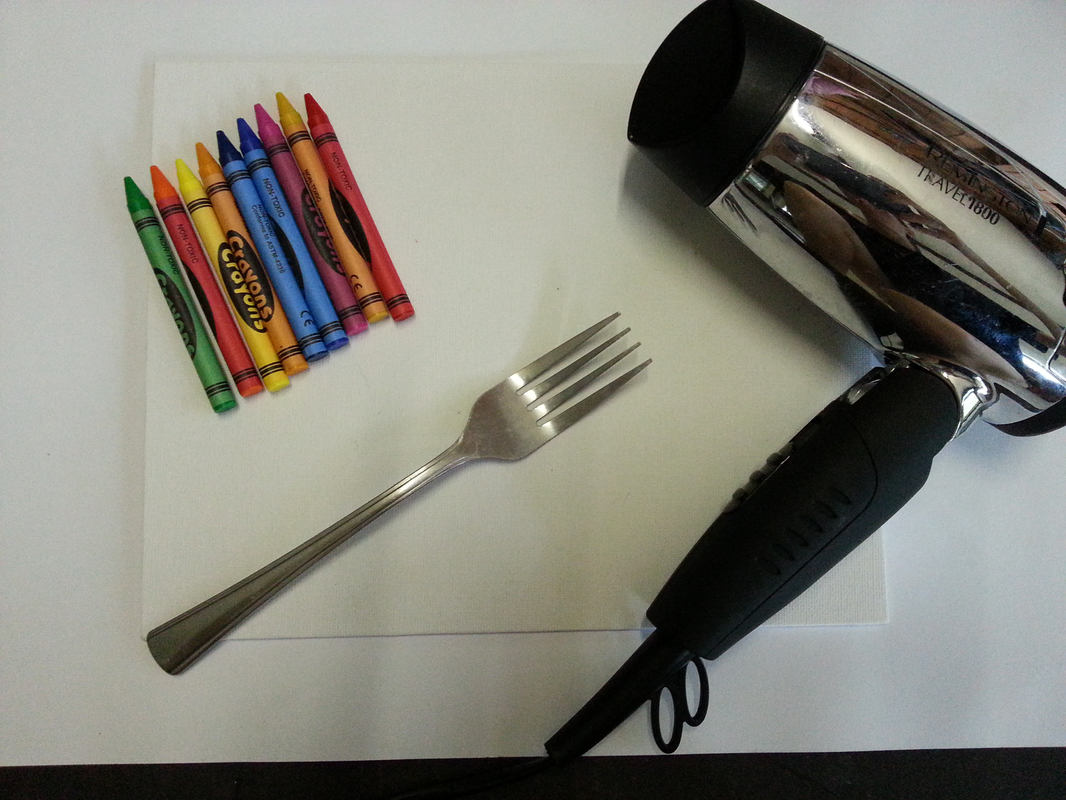
So to start off with you will need an old fork, a hairdryer/blowdryer, crayons and a canvas. Pick crayons that have contrasting colours, you can go for vibrant rainbow colours or you can go for a boy or girsl themed colour scheme or maybe even the colours of your favourite sports team or the colours of your countries flag - the options are endless, if you choose colours that you are happy with then there will be no possible way to end up with a canvas you aren't happy with.
You will need to break the crayons into different sized pieces, the smaller the pieces the better the end result in my opinion but for this tutorial I did one with bigger pieces to show you a little better how to hold and melt the crayons effectively. Not many people are aware that there is a thin clear wax coat on all wax crayons regardless of the quality or brand name behind them. To get the best melting effect with the crayons you can slightly melt them with the hairdryer then roll them on a piece of scrap paper or an old rag to remove the clear wax from the crayon. This eliminates that yuck watery dribble of clear wax that tends to ruin a lot of potentially great melted crayon artworks.
| Grab your fork and stab it slightly into a piece of crayon ready to be melted. The fork helps hold the crayon in place on the flat lying canvas so that the force of the hot air does not blow it all about the canvas. I find that going from the top left corner and working down to the bottom right corner of the canvas looks the mst effective with this kind of crayon melting but you can place the crayons where ever you like and still have an equally awesome outcome. Hold the hair dryer directly above the crayon and fork until you see a residue form, then move the angle of the hair dryer so that it sprays out the melted crayon to create a 'splat' effect. Do this with as many colours as you like in whatever places you like on the canvas until you are happy with the end result. | |
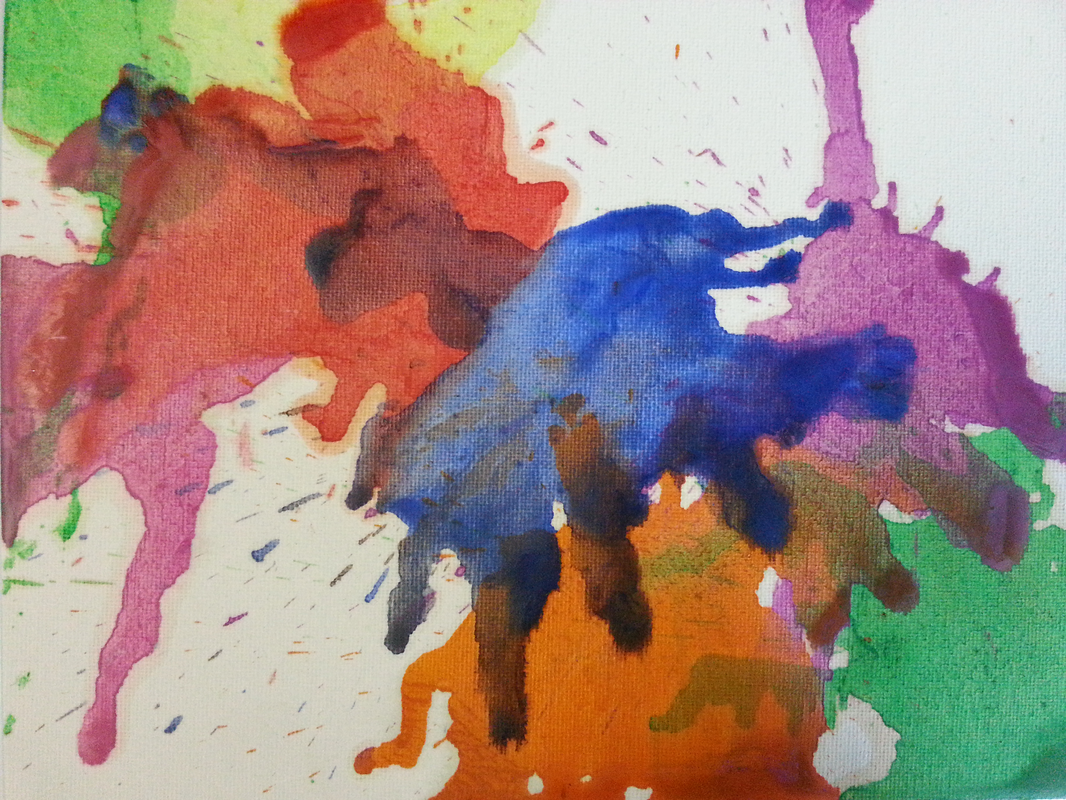
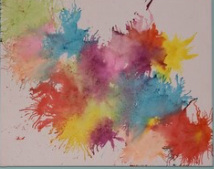
That is pretty much it, with larger crayon pieces you will have something that looks like the picture below to the left, but with smaller pieces you can create something like the picture to the right. The possibilities of colour scemes and end results is limitless. Completely kid-safe, let them help and make a family art piece today!
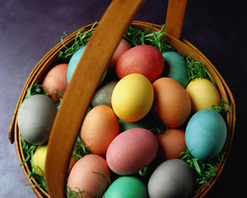
Easter is a colourful exciting time of year for a child - and parents aside from the expenses. Every year I try to find age appropriate Easter themed craft for the kids to help them understand the basic 'hallmark' of the Easter holidays and eveyr year colouring Easter eggs always makes it to the list.
There are loads of ways you can colour an egg, the internet is full of methods, some use vinegar, some don't, some use food colouring, others use clothing dye - it all depends on how vibrant you want the colour to be on the egg. When colouring our eggs, we leave them raw and intact - can get messy with clumsy kidlets but it means that the eggs aren't wasted by being drained and avoids them going smelly if we were to boil then colour them, it also means we can use them for things like scrambled eggs or baking which is great!
| Before dying our eggs we draw patterns on it with white wax crayons. The wax crayon creates a resistance to the dye so that when the egg is submerged in the dye, where the wax is, the egg remains it's natural colour. You can also use sticky tape or rubber bands to create patterns as well, even create a marbled effect by dripping hot wax over the egg before submerging it in the dye. The dye mix we use is 1/2 cup of water to 2 teaspoons of food dye - this is a pastel kind of dye that is kid friendly, if you want a more vibrant colour to the egg add a teaspoon of vinegar to the dye mix. To get the best results we usually try to leave the eggs submerged in the dye for at least 4 minutes. | |
Video Tutorial - How To Colour Easter Eggs.
Happy Easter Everybody!
"You are never too young to play with your food, all you need is a little imagination." - Emilie Moore (2011)
Education doesn't always have to be within the confines of worksheets and flashcards. There are millions upon millions of ways to teach children different things in a creative, exciting way. I mean, let's face it - would you rather have fun, or do worksheets all day? I don't know about you, but paperwork isn't exactly on my list of favourite things to do.
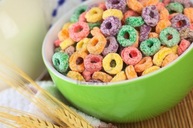
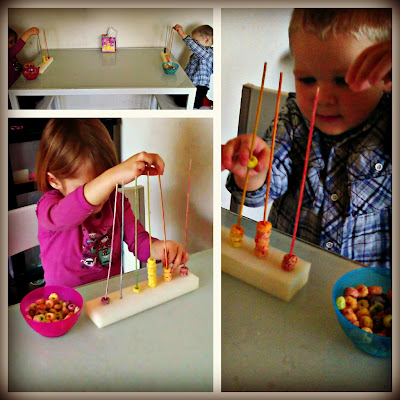
We all know kidlets love Fruit Loops, they are colourful, and sweet and outright tasty in the mind of a child. But have you ever considered using Fruit Loops to teach your special little person things like counting, sorting, colours, fine motor skills or patterns? If not, then welcome to the colourful world of creative learning in the eyes of yours truly! As Miss Arianna nears the age of schooling, I will be sharing more and more blogs on creative ways to teach your child basic life skills. This will include a huge range of ideas collected by myself to make learning feel, well, not like learning at all.
To create a 'workplace' for this activity get a piece of Styrofoam & 5 bamboo skewers. Colour (with crayons, felt pens, dye or paint - I used crayons) each skewer one colour each - red, orange, yellow, green, blue & purple. Then place them in that order spike down into the Styrofoam. I first asked them to sort the fruit loops into the colours and place them on the corresponding skewers, then I asked them to name the colours in a row. To make things a little trickier for them I asked them to count the fruit loops on each skewer for me. So all in all, this nifty trick taught them motor skills (getting the fruit loops onto the skewers), colours, sorting AND counting all in one activity!
Pictured - Miss A and Mr J enjoying their first creative learning lesson :)


 RSS Feed