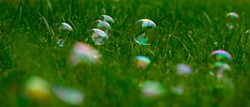
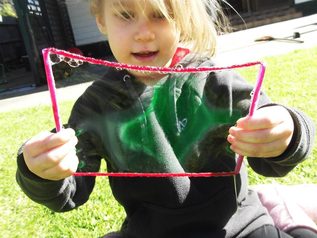
Bubbles, everyone loves them regardless of age, gender or religion. They are a magical thing that can keep kids occupied for hours, but have you ever tried mixing it up a little bit? Adding a bit of colour, doing a little DIY bubble making, maybe even some art & craft with bubbles? I like to get the kids hands on & covered in soap when playing with bubbles, it's one of the joys of being a kid! So here is one of my way of putting a twist on traditional bubbles.
For this you will need:
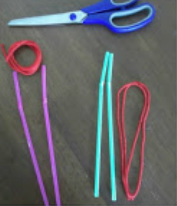
1 long piece of wool
2 straws
Scissors
Bubble mix
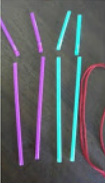
If you have bendy straws you will need to cut the bendy part of the straw off first.
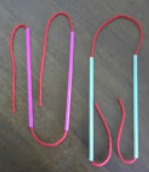
Thread your string straight through both straws then tie a knot at the end of the strings to hold them together.
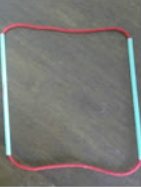
Put the string so that the knot slips into one of the straws & you're all set!
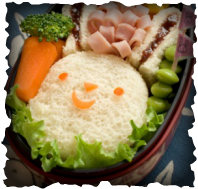
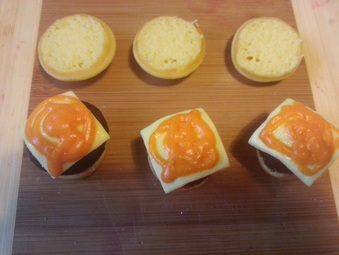
Ham flowers are a fun, quick way to snazz up an everyday lunch. Whether it's in a lunchbox or on a plate, there's never a bad time for a ham flower to appear! These adorable little snacks are assembled in 4 simple steps, making them an easy fix to a boring meal in a matter of minutes!
This ham flower tutorial is one of many step-by-step tutorials in my new book 'Funky, Fresh Food - Your Step-By-Step Guide To Making Healthy Food Fun!' which is available for pre-order
here. The book is due to be released July 1st 2013 & contains 48 illustrated pages to help you work your way through 26 fun, healthy snacks suited to both the lunchbox & the plate, as well as some handy tips & tricks including 6 ways to stop fruits from browning in your kidlets lunchbox & how to make rockmelon roses - a Creative Kidlets 101 exclusive tutorial!
It's as easy as punch!
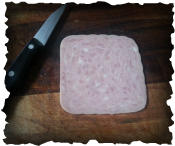
Start with a piece of ham; you can use round or square and a small knife. This technique can also work with turkey or a thin-cooked egg omelette.
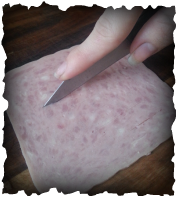
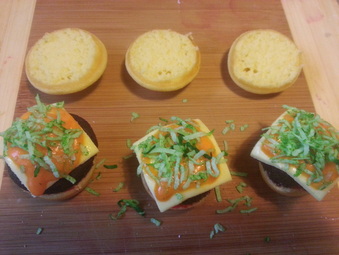
Cut lines in the middle of ham, but not all the way. The lines don’t need to be the exact same distance apart & depending on how thick or thin you want the ‘petals’ to be is how thick or thin of a gap you want between each slice. Be sure not to cut the lines too close to the edge of the ham otherwise your flower will split when you roll it up.
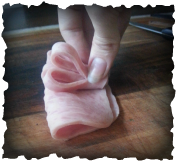
Fold the ham in half in the same direction that you made the slices. Roll up the folded ham but make sure to keep a fairly tight roll to keep the "stem" of the flower together & sturdy.
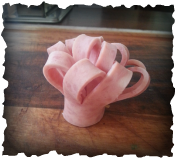
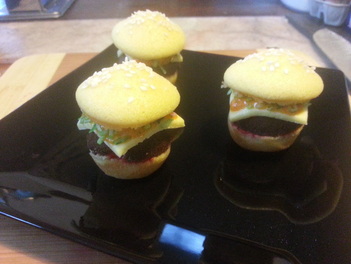
Fan out the petals of the ham flower & cut the base of the stem to make it flat if you prefer then tuck into the lunchbox or place it where you like on the plate.
In my experiences, there is nothing kidlets love more than getting colourfully grubby with finger paints. And most days they will of course stick 10 million tonnes of paint in the one spot until the paper is tearing & decomposing - but that's okay, they are still learning. My only problem with the over-use of paint by kidlets is the price you pay for store bought paint which is never as 'non-toxic' as they say and always comes with that funny smell and hard to get off stain it leaves on clothing & walls. So over the years I have resorted to making my own paints at home - from everyday things you will always find in your cupboard. Both edible and non-edible, tempera powder and food dye - I have tried almost every recipe imaginable, many fails & many successes (as expected!) so to help you avoid all the trials & errors I have compiled my 3 most favourite paint recipes below to share with you all!

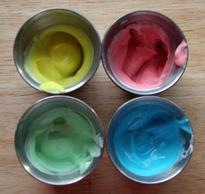
Homemade Bath Paint!What you need:muffin tinshaving creamfood coloringpaint brushWhat you do:- Squirt the shaving cream into each muffin hole.
- Put a couple of drops of food coloring on to each mound of shaving cream. Stir well.
- Go to town painting the bathtub walls (and yourself)!
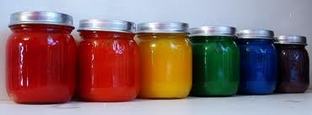
Homemade Poster Paint!What You Need:- 1/4 cup flour
- 1 cup water
- Small jars or plastic containers
- 3 tablespoons powdered tempera paint per container
- 2 tablespoons water per container
- 1/2 teaspoon liquid starch or liquid detergent per container (optional)
What To Do:- Measure flour into saucepan.
- Slowly add 1 cup water while stirring to make a smooth paste.
- Heat, stirring constantly, until paste begins to thicken.
- Cool.
- Measure 1/4 cup paste into each small container.
- Add 3 tablespoons powdered tempera paint and 2 tablespoons water to each container.
- For a matte finish, add liquid starch. For a glossy finish, add liquid detergent.
- Store covered.
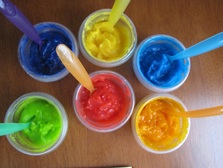
Homemade Finger Paint!
What You Need:
1 cup flour
1/2 cup cornstarch
2 tb salt
2 cup cold water
3 1/2 cup hot water
food coloring
What To Do:
1. In saucepan, mix dry ingredients together.
2. Slowly add cold water to the dry ingredients, whisking as you add.
3. Bring to boil, over medium heat, as you add hot water, whisking continuously.
4. Boil mixture for about 1-2 minutes, whisking continuously, until thick and lumps are gone.
5. Allow to cool slightly in pan then transfer to separate bowls to add color.
6. Mix in a few drops of food coloring to achieve desired color.
7. Allow to cool completely before painting.
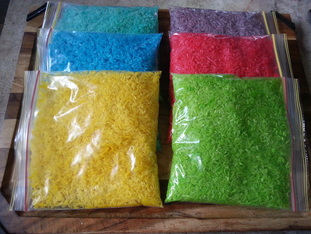
Up until recently I had assumed that everyone knew how to make rainbow rice until I was asked by quite a few how to make it and where I had purchased it from. I shocked a few people when I said I had made it myself at home and because of this I came to the conclusion that it would be far easier and of more value to share this simple trick with the world for those who were unaware that you can make rainbow rice with 3 simple ingredients that everyone has in their home!
To make rainbow rice you will need: 2 cups of long grain rice for each colour you would like to make, 1/4 cup of vinegar for each colour you would like to make, ordinary food dye & a ziplock bag for each colour.
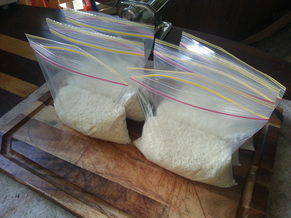
First, place 2 cups of rice in each bag (measurements don't need to be precise, just a rough measure is fine - just get as close as possible or you may end up with a soggy lump of rice). One bag at a time add 1/4 cup of vinegar then the drops of food dye to the mix. Ziplock shut the bag and give it a good shake. Repeat this step for each colour you would like. To dry out the rice you may leave it in the bag with the ziplock open overnight, lay it flat for 4 hours on a piece of baking paper or you can place it on a lined baking tray in the oven at 100c for 10-15 minutes to quick dry it (be sure to let it cool before allowing the kids to play with it!)
You can mix whatever colours you want and add as many dye drops as you like to get the vibrancy that you are after. It is completely safe for children to eat (if you have those little ones that believe EVERYTHING belongs in their mouth!) & it's much easier to clean than playdough!
That's all there is to it! Remember - rainbow rice is not just for schools & daycares, it is awesome for sensory play and motor skills, even art & craft if you wanted.
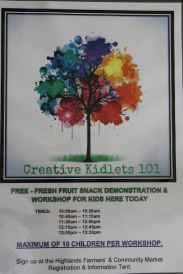
So today was both my first ever demonstration & my first ever market stall. To say that I was terrified would have been an understatement. Those who know me would have been well aware of my fear of public speaking & talking to crowds of strangers - today, I had to overcome both of those as I stood in the public eye of a nearby suburb at Highlands Farmers' & Community Market to hold both a stall & a demonstration where I taught children how to make their very own strawberry race cars. While it was a very chaotic day I must admit it was very fun & definitely a well awaited experience. It was so unusual to be standing on the other side of the markets instead of being a general market attendee. A big thank you goes out to Georgina, the market manager, for pulling it all off & allowing me to be a part of the first market of 2013 in Highlands. She did a fantastic job! I would also like to thank all those who popped by and said hello & everyone who also wished me luck - it was definitely needed & I don't think I would have gotten this far without your ongoing support! x


 RSS Feed