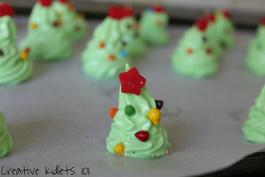
Tis' the season to be jolly! And there is no better way to celebrate than to have a funky looking sweet treat! These Christmas tree meringues are a cinch to make & taste great too! They make the perfect snack for Christmas parties & store for up to 3 whole weeks (if they last that long!). The recipe below has been altered to suit the meringue trees, if you would like to make any other shape meringue, simply use the same method & ingredients minus the rainbow chips, sugar star & green dye.
In my experiences, there is nothing kidlets love more than getting colourfully grubby with finger paints. And most days they will of course stick 10 million tonnes of paint in the one spot until the paper is tearing & decomposing - but that's okay, they are still learning. My only problem with the over-use of paint by kidlets is the price you pay for store bought paint which is never as 'non-toxic' as they say and always comes with that funny smell and hard to get off stain it leaves on clothing & walls. So over the years I have resorted to making my own paints at home - from everyday things you will always find in your cupboard. Both edible and non-edible, tempera powder and food dye - I have tried almost every recipe imaginable, many fails & many successes (as expected!) so to help you avoid all the trials & errors I have compiled my 3 most favourite paint recipes below to share with you all!

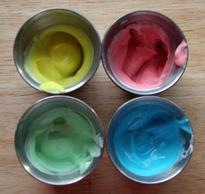
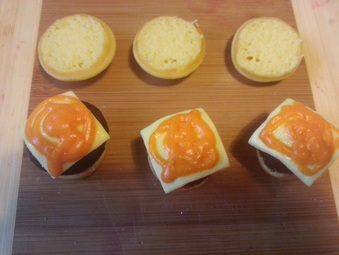
Homemade Bath Paint!What you need:muffin tinshaving creamfood coloringpaint brushWhat you do:- Squirt the shaving cream into each muffin hole.
- Put a couple of drops of food coloring on to each mound of shaving cream. Stir well.
- Go to town painting the bathtub walls (and yourself)!
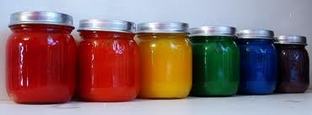
Homemade Poster Paint!What You Need:- 1/4 cup flour
- 1 cup water
- Small jars or plastic containers
- 3 tablespoons powdered tempera paint per container
- 2 tablespoons water per container
- 1/2 teaspoon liquid starch or liquid detergent per container (optional)
What To Do:- Measure flour into saucepan.
- Slowly add 1 cup water while stirring to make a smooth paste.
- Heat, stirring constantly, until paste begins to thicken.
- Cool.
- Measure 1/4 cup paste into each small container.
- Add 3 tablespoons powdered tempera paint and 2 tablespoons water to each container.
- For a matte finish, add liquid starch. For a glossy finish, add liquid detergent.
- Store covered.
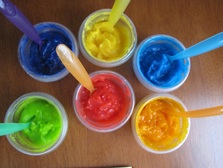
Homemade Finger Paint!
What You Need:
1 cup flour
1/2 cup cornstarch
2 tb salt
2 cup cold water
3 1/2 cup hot water
food coloring
What To Do:
1. In saucepan, mix dry ingredients together.
2. Slowly add cold water to the dry ingredients, whisking as you add.
3. Bring to boil, over medium heat, as you add hot water, whisking continuously.
4. Boil mixture for about 1-2 minutes, whisking continuously, until thick and lumps are gone.
5. Allow to cool slightly in pan then transfer to separate bowls to add color.
6. Mix in a few drops of food coloring to achieve desired color.
7. Allow to cool completely before painting.
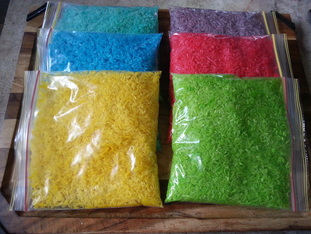
Up until recently I had assumed that everyone knew how to make rainbow rice until I was asked by quite a few how to make it and where I had purchased it from. I shocked a few people when I said I had made it myself at home and because of this I came to the conclusion that it would be far easier and of more value to share this simple trick with the world for those who were unaware that you can make rainbow rice with 3 simple ingredients that everyone has in their home!
To make rainbow rice you will need: 2 cups of long grain rice for each colour you would like to make, 1/4 cup of vinegar for each colour you would like to make, ordinary food dye & a ziplock bag for each colour.
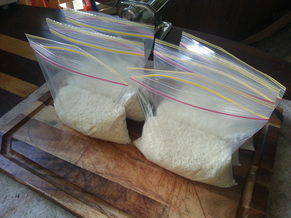
First, place 2 cups of rice in each bag (measurements don't need to be precise, just a rough measure is fine - just get as close as possible or you may end up with a soggy lump of rice). One bag at a time add 1/4 cup of vinegar then the drops of food dye to the mix. Ziplock shut the bag and give it a good shake. Repeat this step for each colour you would like. To dry out the rice you may leave it in the bag with the ziplock open overnight, lay it flat for 4 hours on a piece of baking paper or you can place it on a lined baking tray in the oven at 100c for 10-15 minutes to quick dry it (be sure to let it cool before allowing the kids to play with it!)
You can mix whatever colours you want and add as many dye drops as you like to get the vibrancy that you are after. It is completely safe for children to eat (if you have those little ones that believe EVERYTHING belongs in their mouth!) & it's much easier to clean than playdough!
That's all there is to it! Remember - rainbow rice is not just for schools & daycares, it is awesome for sensory play and motor skills, even art & craft if you wanted.
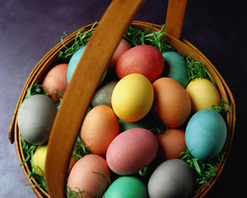
Easter is a colourful exciting time of year for a child - and parents aside from the expenses. Every year I try to find age appropriate Easter themed craft for the kids to help them understand the basic 'hallmark' of the Easter holidays and eveyr year colouring Easter eggs always makes it to the list.
There are loads of ways you can colour an egg, the internet is full of methods, some use vinegar, some don't, some use food colouring, others use clothing dye - it all depends on how vibrant you want the colour to be on the egg. When colouring our eggs, we leave them raw and intact - can get messy with clumsy kidlets but it means that the eggs aren't wasted by being drained and avoids them going smelly if we were to boil then colour them, it also means we can use them for things like scrambled eggs or baking which is great!
| Before dying our eggs we draw patterns on it with white wax crayons. The wax crayon creates a resistance to the dye so that when the egg is submerged in the dye, where the wax is, the egg remains it's natural colour. You can also use sticky tape or rubber bands to create patterns as well, even create a marbled effect by dripping hot wax over the egg before submerging it in the dye. The dye mix we use is 1/2 cup of water to 2 teaspoons of food dye - this is a pastel kind of dye that is kid friendly, if you want a more vibrant colour to the egg add a teaspoon of vinegar to the dye mix. To get the best results we usually try to leave the eggs submerged in the dye for at least 4 minutes. | |
Video Tutorial - How To Colour Easter Eggs.
Happy Easter Everybody!


 RSS Feed