 Up until recently I had assumed that everyone knew how to make rainbow rice until I was asked by quite a few how to make it and where I had purchased it from. I shocked a few people when I said I had made it myself at home and because of this I came to the conclusion that it would be far easier and of more value to share this simple trick with the world for those who were unaware that you can make rainbow rice with 3 simple ingredients that everyone has in their home!
To make rainbow rice you will need: 2 cups of long grain rice for each colour you would like to make, 1/4 cup of vinegar for each colour you would like to make, ordinary food dye & a ziplock bag for each colour.
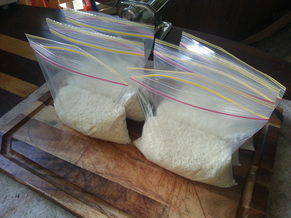 First, place 2 cups of rice in each bag (measurements don't need to be precise, just a rough measure is fine - just get as close as possible or you may end up with a soggy lump of rice). One bag at a time add 1/4 cup of vinegar then the drops of food dye to the mix. Ziplock shut the bag and give it a good shake. Repeat this step for each colour you would like. To dry out the rice you may leave it in the bag with the ziplock open overnight, lay it flat for 4 hours on a piece of baking paper or you can place it on a lined baking tray in the oven at 100c for 10-15 minutes to quick dry it (be sure to let it cool before allowing the kids to play with it!)
You can mix whatever colours you want and add as many dye drops as you like to get the vibrancy that you are after. It is completely safe for children to eat (if you have those little ones that believe EVERYTHING belongs in their mouth!) & it's much easier to clean than playdough!
That's all there is to it! Remember - rainbow rice is not just for schools & daycares, it is awesome for sensory play and motor skills, even art & craft if you wanted.
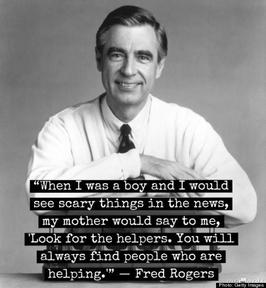 With so much tragedy going on in the USA over the last week, it has got me wondering about the safety of our kids. First there was the bombing at a public event in Boston. Then a horrific explosion in Waco Texas and the shooting at MIT today. Although, we are in Australia, do you ever wonder if this sort of tragedy will reach us here? And, if it was to, how do we keep our kids safe? Mr Rogers, a legendary TV host, teaches us to explain to our kids, in a time of crisis “To Look For The Helpers”. To show our kids to look for those heroes that run into fires and save people. Helpers who are the first on scene to rescue and bring relief. We look up to these heroes as super heroes, and we honestly believe they are. I really believe that it is a great way to comfort our young ones when it comes to world tragedy. But, it still doesn’t teach our kids how to keep safe, or protect our own hearts when we send our kids out into the world without us. A dear friend’s son was involved in a horrific car accident yesterday. He is lucky to escape with his life, let alone survive with only a singed eyebrow from the airbag. He’s an adult and she still cannot comprehend how to keep her adult son safe. So, its not just us with young ones who panic, who worry and who look to whatever higher power to keep our little ones safe. The debate continues. Do we show our kids tragedy and prepare them for what life can bring? Or do we shelter them from danger in the world. How do we balance what is right and what is wrong. Only trial and error can really tell, and evaluating the maturity of the child and what they can handle. I’ve covered stranger danger with my kids (who are mostly teens now), and the “icky factor” that some people carry that make them nervous. I wonder if it helped or harmed my almost 15 year old son recently. He was with his friends, out at a day at the beach when he was confronted by a gaggle of older boys. About 8 20 year old boys approached him when his instinct was to be cautious. That little voice inside of him said “beware”. I’ve always told my kids that the little voice inside of them is God’s way of teaching us right from wrong (although we are not an overly religious family). The “Lads”, as he described them, assaulted him and stole his precious iPhone he got for Christmas. He was distraught at the vulgarity of these Lads, and gave into their demands. Even more so, he was distraught at himself for not fighting for himself. So, did I teach him right from wrong? Did I teach him how to handle danger? I thought I had, but I never covered this. But, his inner voice told him to give in to them, and perhaps that saved him? I will never know. I guess in summary I am saying, bad stuff happens in the world. We have to trust that our young people know what is right and what is wrong when it comes to danger. We have to trust our own parenting to teach them. No matter how much or how little exposure to violence or global tragedy will make them prepared for the adventures they go on, when you think they are safe. Maybe this is the time for belief in a higher power than us. My friend, who’s son was in the car accident, believes in angels and that angels watched over her son. So what harm can come if we just step back and have a little faith. Written by guest writer Alice Slamani. Known as The Laundry Fairy and also Creative Consultant at gFocus Photography ( www.gFocusPhotography.com)
There are hundreds of ways to make scented playdough, but I would like to share some of my favourites with you all. Playdough is fun enough as it is but it's even better when you can make playdough cupcakes and playdough bikkies that actually smell like the real deal! Traditional playdough has a pretty funky smell that some people find hard to mask - well here is a list of other ways to make scrumptious smelling playdough that have all been tried and tested by yours truly! :) 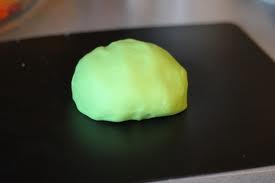 Fruity Scented Playdough (Non-Edible)You will need:1 cup plain flour 2 tablespoons oil 200ml water 50ml fruity fragrant shampoo ½ cup salt 2 teaspoons cream of tartar Food colouring to match your scent (green for apple, red for strawberry, orange/yellow for orange/mango) How to make it?- Pour all dry ingredients, flour, salt and cream of tartar together in a saucepan.
- Add oil, shampoo, colouring and water to dry ingredients.
- I use a whisk before heating as I find this helps remove lumps and blends the ingredients well.
- Cook over medium heat constantly stirring until it becomes a thick blob.
- Then turn out onto a clean surface and knead into a smooth ball. Be careful the play dough will be very hot!
- Store in a plastic zip lock bag or air tight container.
 Peppermint Scented Playdough (Edible)You will need:1 cup all-purpose flour (sift if lumpy) 1/2 cup salt 2 teaspoons cream of tarter 1 cup brewed peppermint tea 1 1/2 tablespoons oil (vegetable or canola) 1 tablespoon peppermint extract Food coloring, as desired How to make it?- In a sauce pan, whisk together the flour, salt and cream of tarter. Add the water and oil and whisk until smooth.
- Place pan over low heat and cook and stir until it thickens and forms a ball (about 5 minutes for a single recipe). When it's impossible to stir and looks like a big sticky lump, it's done! :)
- Turn out onto the counter or a mat, scraping pan clean with a spatula. Knead the warm dough a couple times, and place in a loosely-covered container to cool. (Or, let the kids play with it right away!) Store in a sealed container or ziplock bag when not in use.
| 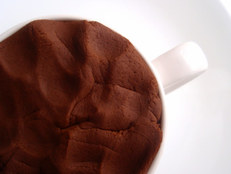 Chocolate Scented Playdough (Edible)You will need:1 cup all-purpose flour (sift if lumpy) 1/2 cup salt 2 teaspoons cream of tarter 1 cup water 2 1/2 tablespoons oil (vegetable or canola) 1/3 cup cocoa powder 1 teaspoon vanilla extract How to make it?- In a sauce pan, whisk together the flour, salt and cream of tarter. Add the water and oil and whisk until smooth.
- Place pan over low heat and cook and stir until it thickens and forms a ball (about 5 minutes for a single recipe). When it's impossible to stir and looks like a big sticky lump, it's done! :)
- Turn out onto the counter or a mat, scraping pan clean with a spatula. Knead the warm dough a couple times, and place in a loosely-covered container to cool. (Or, let the kids play with it right away!) Store in a sealed container or ziplock bag when not in use.
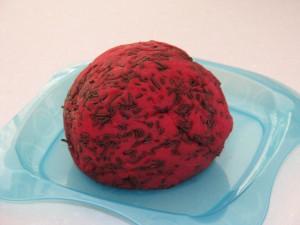 Strawberry Scented Playdough (Edible)You will need:1 cup plain flour 1 Tablespoon oil 200ml Water 50ml Strawberry Essence ½ cup salt ¼ cup chocolate sprinkles 2 Teaspoons cream of tartar 1 Teaspoon of rose pink food colouring How to make it?- Pour all dry ingredients, flour, salt and cream of tartar together in a saucepan.
- Add oil, food colouring, strawberry essence and water to dry ingredients.
- I use a whisk before heating as I find this helps remove lumps and blends the ingredients.
- Cook over medium heat constantly stirring until it becomes a thick blob.
- Then turn out onto a clean surface and knead into a smooth blob.
- Allow the play dough to cool before kneading in the chocolate sprinkles.
- Store in a plastic zip lock bag or air tight container.
| Those are the basic ones to get you started, feel free to change it up and experiment - maybe add some glitter, or some pony beads, or even some hundreds and thousands! The possibilities are only as limited as your imagination allows. ;)
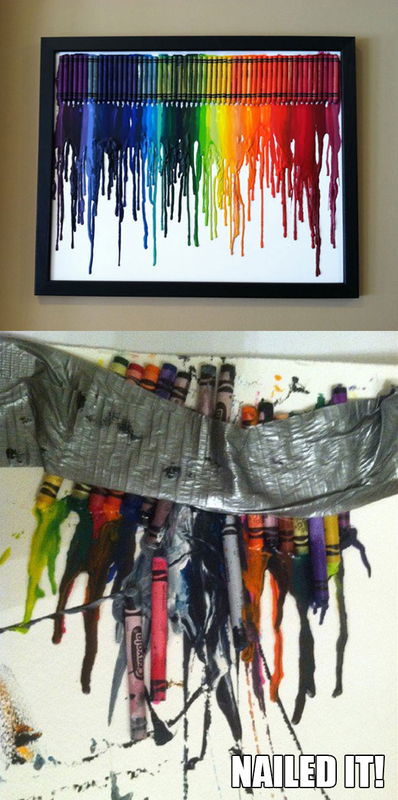
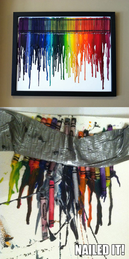 We have all seen those crafts on Pinterest and been guilty for creating one of those well known 'Pinstrosities'. Melted crayon art used to be one of my biggest, most common Pinterest fails because I always wanted to let the kidlets help with the actvity and it would never turn out quite right. So I have gone to the drawing board and come up with a list of new twists on the old trick and am here to share them with you week by week I will count down my favorite ways to do crayon melting that is kid friendly and far less likely to result in another 'Pinstrosity'. Today I am sharing a 'splattered' version of melted crayon art.
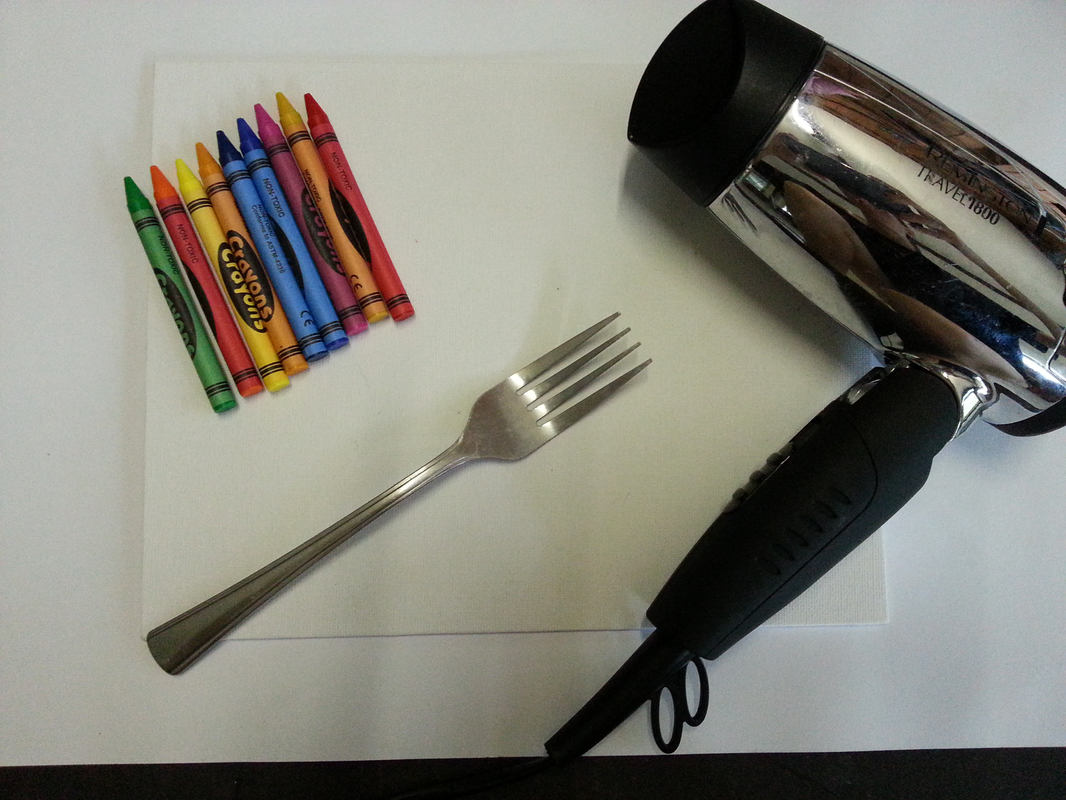
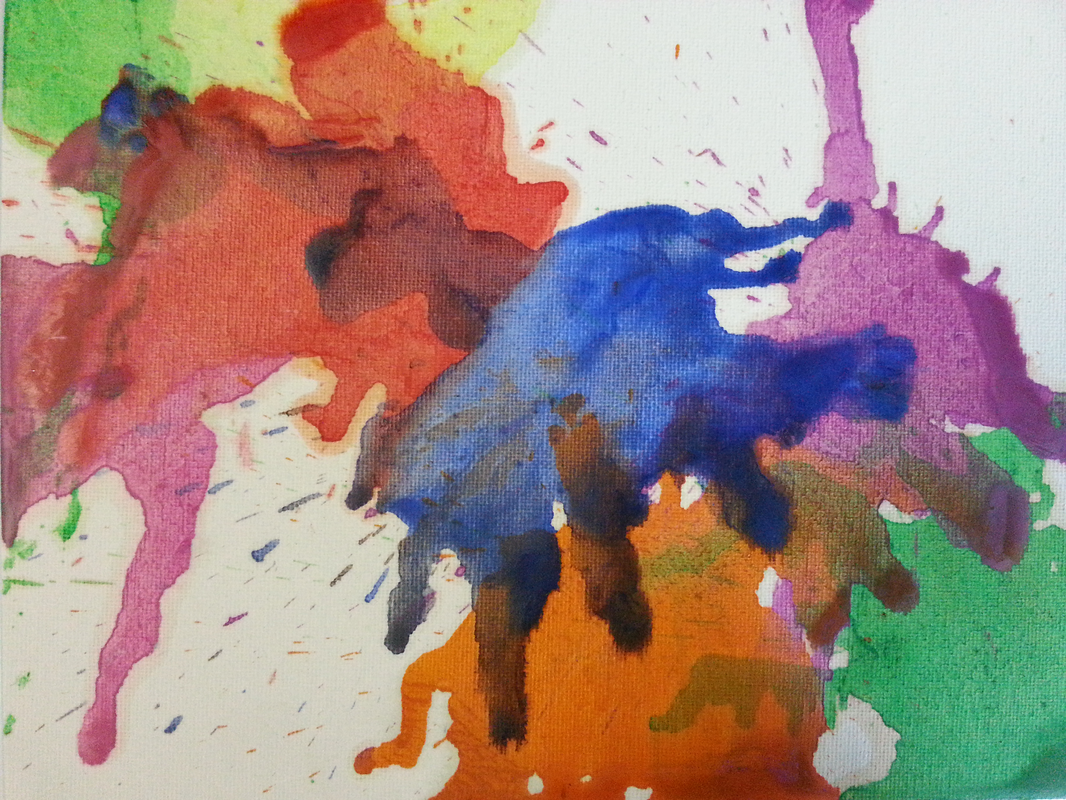
So to start off with you will need an old fork, a hairdryer/blowdryer, crayons and a canvas. Pick crayons that have contrasting colours, you can go for vibrant rainbow colours or you can go for a boy or girsl themed colour scheme or maybe even the colours of your favourite sports team or the colours of your countries flag - the options are endless, if you choose colours that you are happy with then there will be no possible way to end up with a canvas you aren't happy with. You will need to break the crayons into different sized pieces, the smaller the pieces the better the end result in my opinion but for this tutorial I did one with bigger pieces to show you a little better how to hold and melt the crayons effectively. Not many people are aware that there is a thin clear wax coat on all wax crayons regardless of the quality or brand name behind them. To get the best melting effect with the crayons you can slightly melt them with the hairdryer then roll them on a piece of scrap paper or an old rag to remove the clear wax from the crayon. This eliminates that yuck watery dribble of clear wax that tends to ruin a lot of potentially great melted crayon artworks. | Grab your fork and stab it slightly into a piece of crayon ready to be melted. The fork helps hold the crayon in place on the flat lying canvas so that the force of the hot air does not blow it all about the canvas. I find that going from the top left corner and working down to the bottom right corner of the canvas looks the mst effective with this kind of crayon melting but you can place the crayons where ever you like and still have an equally awesome outcome. Hold the hair dryer directly above the crayon and fork until you see a residue form, then move the angle of the hair dryer so that it sprays out the melted crayon to create a 'splat' effect. Do this with as many colours as you like in whatever places you like on the canvas until you are happy with the end result. | | That is pretty much it, with larger crayon pieces you will have something that looks like the picture below to the left, but with smaller pieces you can create something like the picture to the right. The possibilities of colour scemes and end results is limitless. Completely kid-safe, let them help and make a family art piece today!
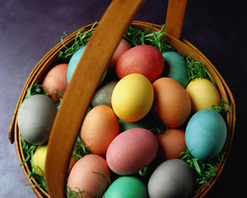 Easter is a colourful exciting time of year for a child - and parents aside from the expenses. Every year I try to find age appropriate Easter themed craft for the kids to help them understand the basic 'hallmark' of the Easter holidays and eveyr year colouring Easter eggs always makes it to the list.
There are loads of ways you can colour an egg, the internet is full of methods, some use vinegar, some don't, some use food colouring, others use clothing dye - it all depends on how vibrant you want the colour to be on the egg. When colouring our eggs, we leave them raw and intact - can get messy with clumsy kidlets but it means that the eggs aren't wasted by being drained and avoids them going smelly if we were to boil then colour them, it also means we can use them for things like scrambled eggs or baking which is great!
| Before dying our eggs we draw patterns on it with white wax crayons. The wax crayon creates a resistance to the dye so that when the egg is submerged in the dye, where the wax is, the egg remains it's natural colour. You can also use sticky tape or rubber bands to create patterns as well, even create a marbled effect by dripping hot wax over the egg before submerging it in the dye. The dye mix we use is 1/2 cup of water to 2 teaspoons of food dye - this is a pastel kind of dye that is kid friendly, if you want a more vibrant colour to the egg add a teaspoon of vinegar to the dye mix. To get the best results we usually try to leave the eggs submerged in the dye for at least 4 minutes. | | Video Tutorial - How To Colour Easter Eggs. Happy Easter Everybody!
"You are never too young to play with your food, all you need is a little imagination." - Emilie Moore (2011) 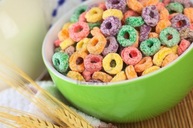 Education doesn't always have to be within the confines of worksheets and flashcards. There are millions upon millions of ways to teach children different things in a creative, exciting way. I mean, let's face it - would you rather have fun, or do worksheets all day? I don't know about you, but paperwork isn't exactly on my list of favourite things to do.
We all know kidlets love Fruit Loops, they are colourful, and sweet and outright tasty in the mind of a child. But have you ever considered using Fruit Loops to teach your special little person things like counting, sorting, colours, fine motor skills or patterns? If not, then welcome to the colourful world of creative learning in the eyes of yours truly! As Miss Arianna nears the age of schooling, I will be sharing more and more blogs on creative ways to teach your child basic life skills. This will include a huge range of ideas collected by myself to make learning feel, well, not like learning at all.
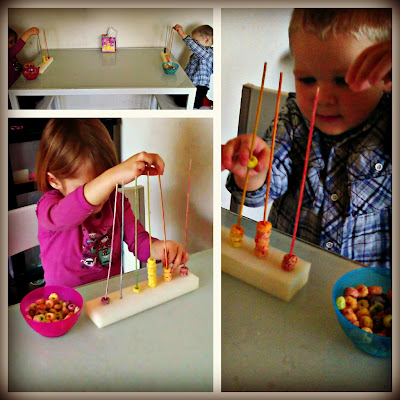
To create a 'workplace' for this activity get a piece of Styrofoam & 5 bamboo skewers. Colour (with crayons, felt pens, dye or paint - I used crayons) each skewer one colour each - red, orange, yellow, green, blue & purple. Then place them in that order spike down into the Styrofoam. I first asked them to sort the fruit loops into the colours and place them on the corresponding skewers, then I asked them to name the colours in a row. To make things a little trickier for them I asked them to count the fruit loops on each skewer for me. So all in all, this nifty trick taught them motor skills (getting the fruit loops onto the skewers), colours, sorting AND counting all in one activity!
Pictured - Miss A and Mr J enjoying their first creative learning lesson :)
Lets face it! The weather sucks, well for most people anyway - but especially if you have little ones. The afternoons when it’s too hot to nap, too hot to be outside and sweaty, sticky fingers just want to curl up in your lap when all you want to do is lay in front of the air conditioning! What do you do? I don’t have much patience on days like this. Instead, I have an idea on how to beat the heat and occupy the kids!
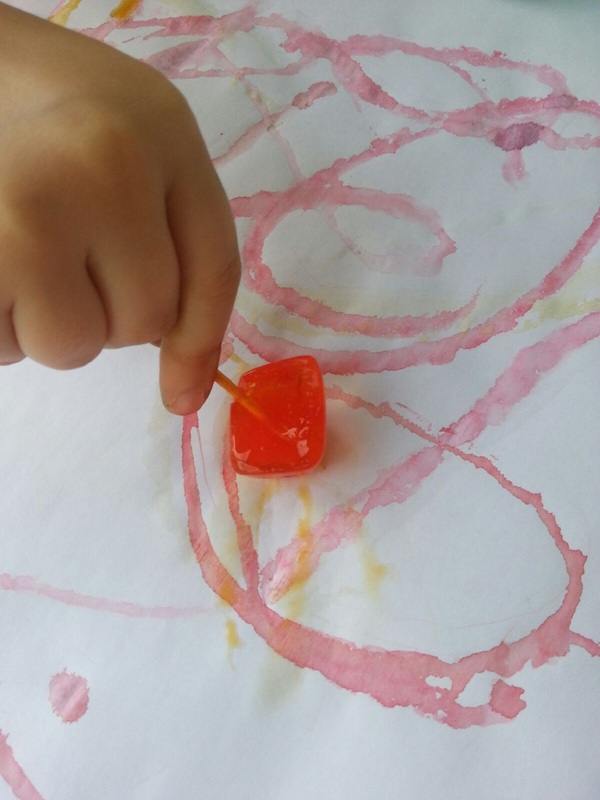
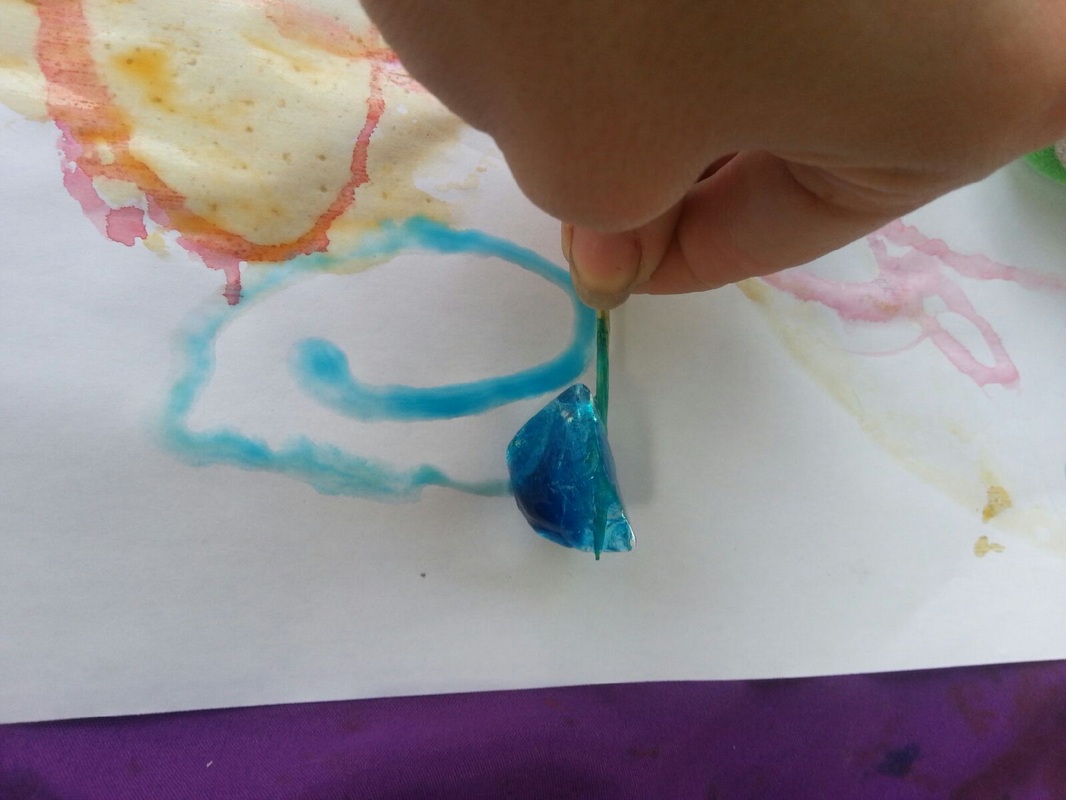
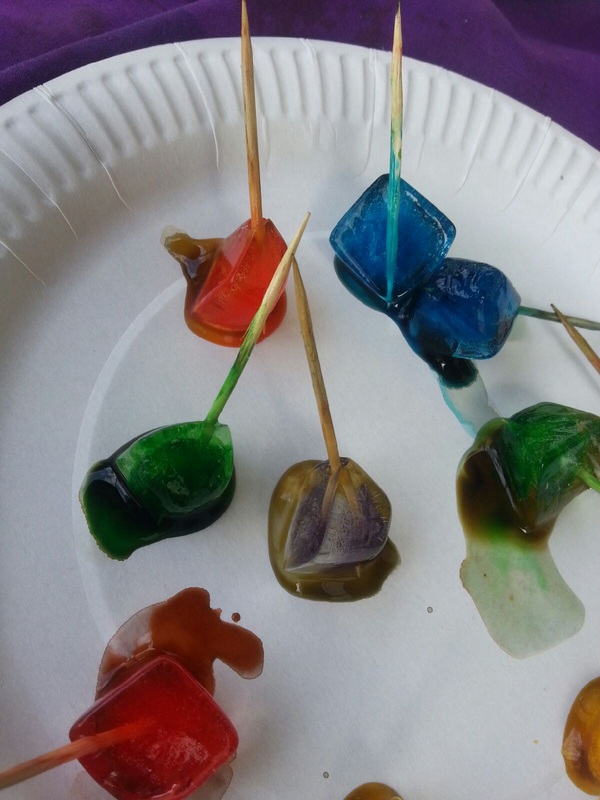
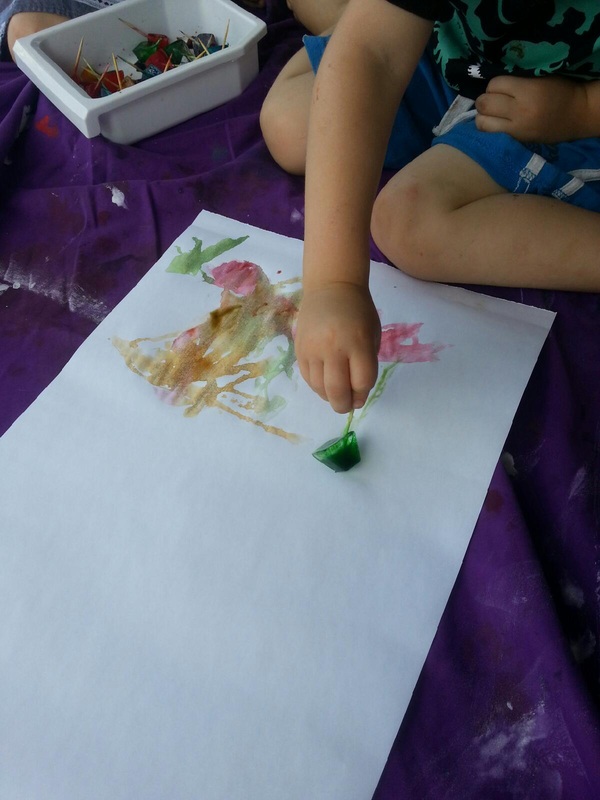
What is it? I hear you ask.... well, let me share with you a way to make the little fingers in your house cool down. Ice painting. Yes, it’s that simple!
You may have seen them in the “Reject Shop” or cheap stores, but there are heaps of shapes and styles of ice cube trays in a variety of animal designs. You don’t even need those, just a regular ice tray is fine! The more fun you make it though, the longer you will keep the rug rats busy.
Lets add water, and different food colouring colours to the water, and pop in a toothpick. Carefully, pop it into the freezer. During the heat of the day, and the crankiness that goes with it - grab them out. And lets start to paint! Here, I am showing them being used to paint paper. Why not try concrete as well? Why not put them in a glass of water and watch the shapes melt?
Its fun, cheap and most of all something you can do to cool down on a very hot day. Thank goodness there are only a few more weeks of Summer left! This is one of the original kiddy chill pills!
Written by guest writer Alice Slamani. Known as The Laundry Fairy and also Creative Consultant at gFocus Photography ( www.gFocusPhotography.com)
Now that my kids are teenagers, I look back fondly and realise what a stress head I was in the beginning. Knowing, learning and believing what is right for your kids is all you ever think about when the first one comes along. When the second comes along, you think you’ve got things under control - until you realise the work load is actually doubled! Only then do you learn some short-cuts, and by short-cuts I mean you stop giving ALL of your time to stressing! Here is my top list of things I wish I would have listened to, if I could have my do-over. - Kids don’t die if they wear mis-matched socks!
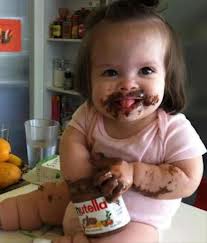
- Nutella is a food group when eaten off a spoon with a glass of milk
- You will survive if you don’t have a change of clothes in the car for each hour of the day
- Forget the nappy bag! If you cant carry it in your pocket, you don’t need it! We are never too far from home that we cant get something
- No baby died from not having a nappy change in the middle of the night
- On that note, if you boob-feed and sleep with baby in the bed, you really don’t need to get up in the middle of the night! WINNING!
- Alcohol is bad for children, but rubbing rum on the gums of a screaming teething child works
 - Saying NO should start really early. Because by the time they can really scream mean words at you, its too late.
- Kids feel awesome when they dress themselves. Really does matching leggings really matter? Inside out and back-to-front works too!
- Put your kids to bed early, because having time as a grown up is desperately the most important part of the day
- Breakfast is really important. And, if the only thing you can get your kids to honestly eat is cocoa pops then just give in. Its more important that they eat something before school
- Bite baby’s nails. So easy and so much safer than clippers.
- Take photos of random stuff anytime. But don’t publish them ALL on Facebook. Show off on social media! Its all about who is the most awesome!
- Keep lists in the car, kitchen, toilet. (yes! Stick paper on the wall with a pencil. Crayon on the back of the door works too!)
- Put a lock on one room of the house. Its important to be able to lock the buggars out of somewhere
- Never buy a highlighter! If a kid draws on a wall with yellow highlighter, it NEVER comes off, no matter how many coats of paint you use! (true fact! trust me!)
- Breakfast for dinner is fun
- Don’t let anyone make you feel bad for your parenting. If so, tell them their kid is fat, then ask them how they feel?
- Everyone lies about how often they changes their sheets.
- Ear plugs work
- Let your kids make a mess, build a fort and sleep on the floor.
- Keep a book by the bed, and write a memory every day. Write down everything funny - because even though you think you will never forget, you will
- Don’t blog or publish online the extra special moments. Keep them private, they will never be forgotten
- Undies and socks can be turned inside out
- Don’t brag about how awesome your kid is. You will never win that conversation with anyone. All of us think our child is the most special.
- Try not to be a “gunna” with your kids. Gunna go the Royal Show, Zoo, shops or anywhere just spoils a kid’s respect of you. Be a do-er, if you can. Although, kids need to live with disappointment
- Laugh when your kids remind you of yourself. Then remember to call your own parents and apologise!
Remember always, they are your kids, no one else’s! And, you are always the parent and THE BOSS!
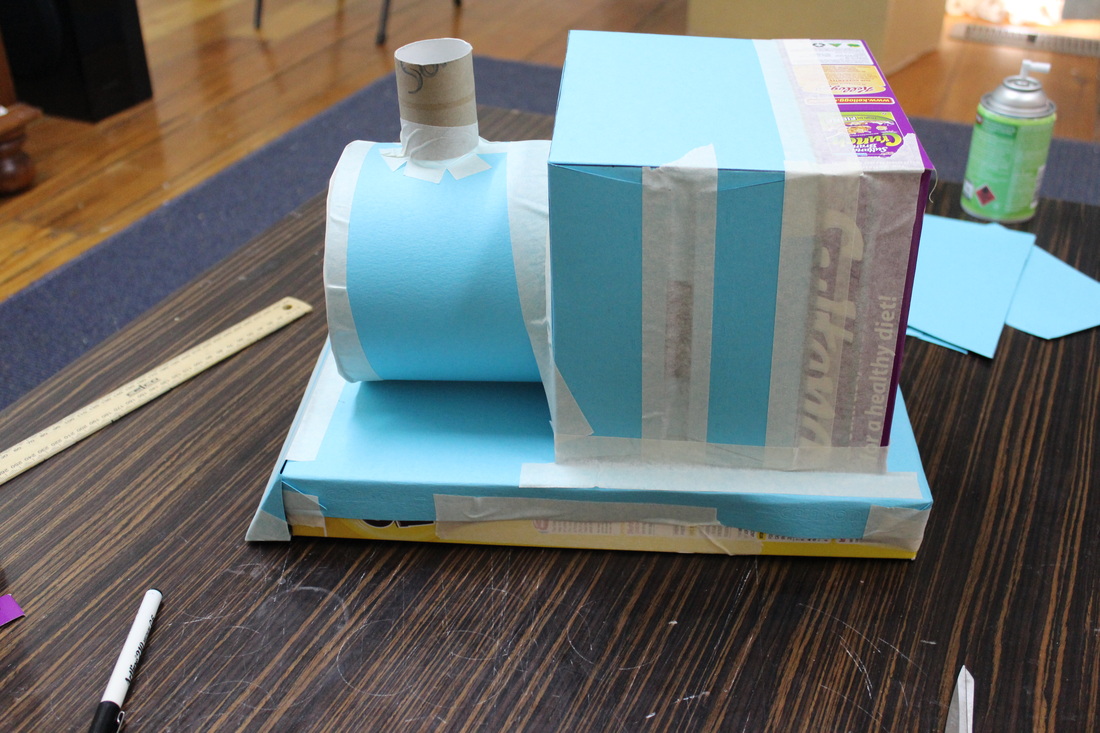
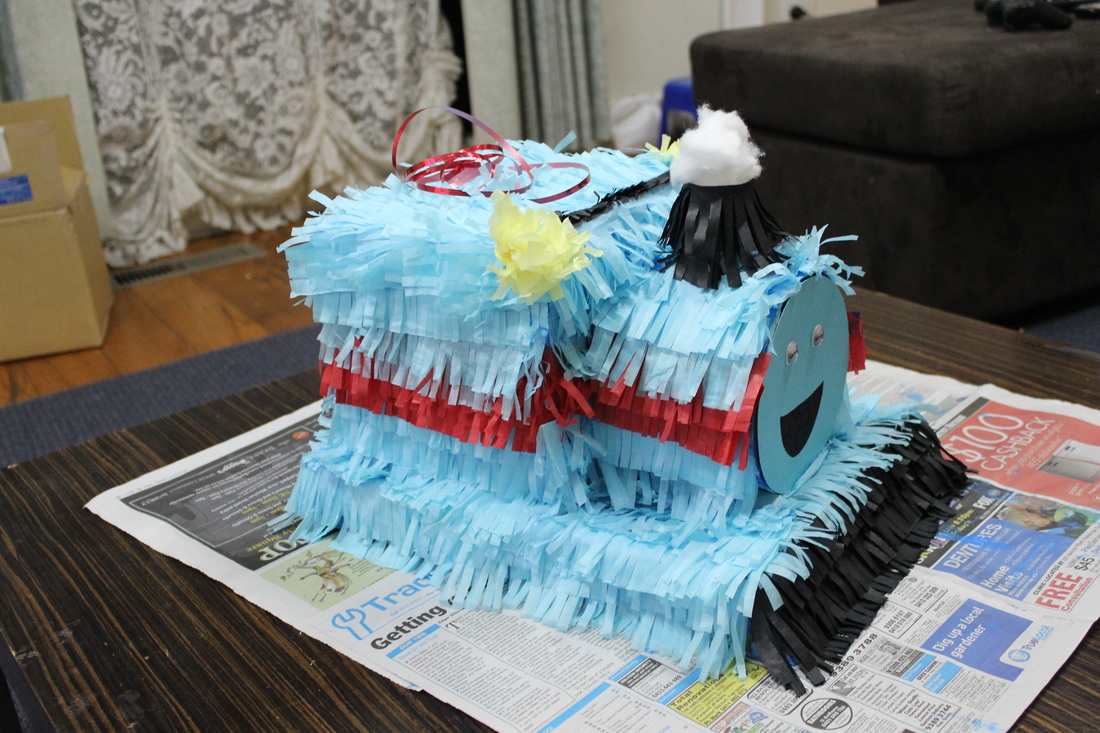
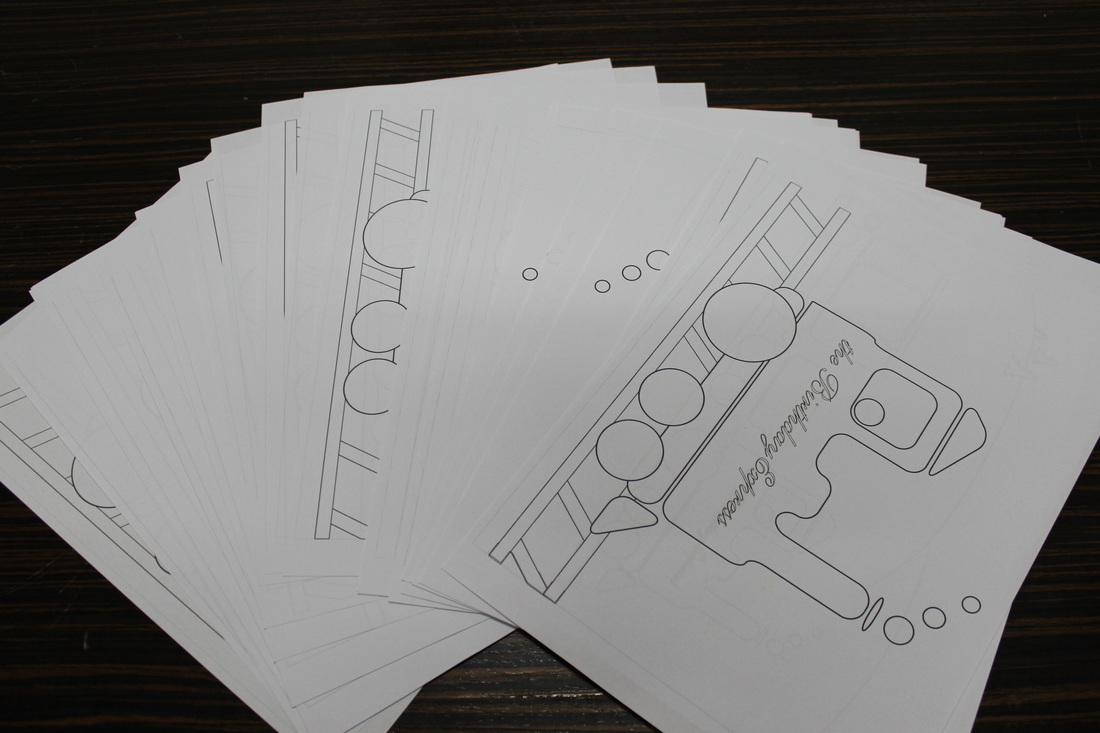
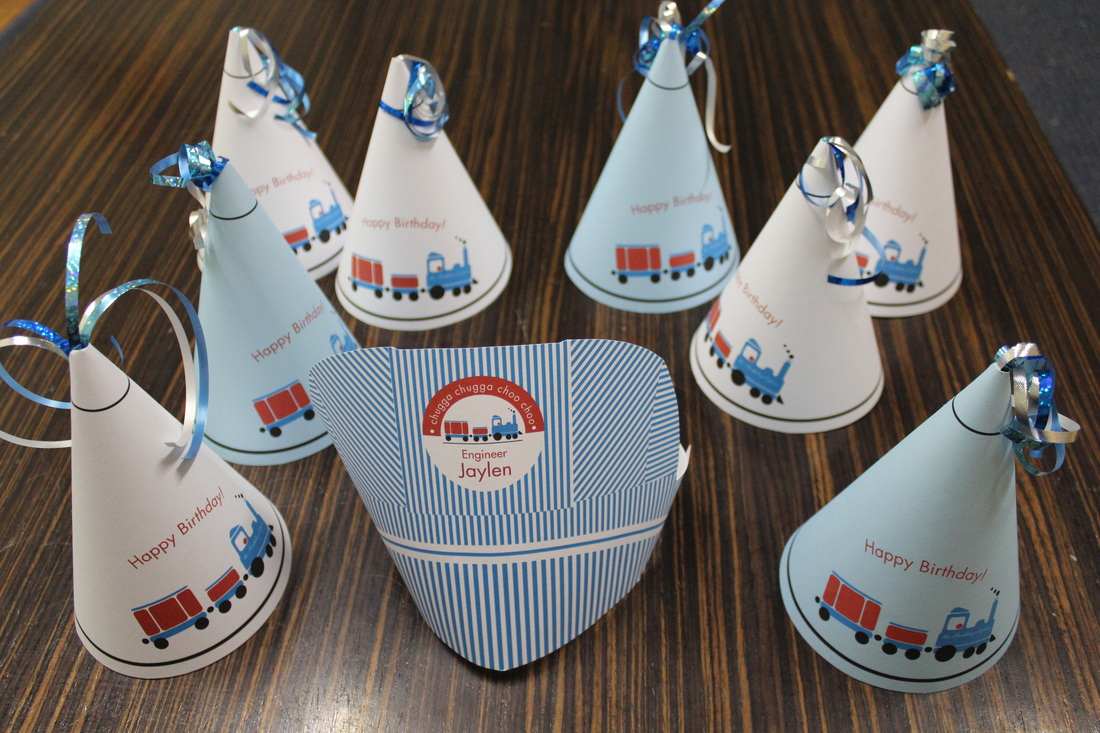
If there is one thing my son loves more than food it's definitely trains! So this year for his birthday I decided to do a train themed birthday party - however - I didn't want a licensed or character party so had to avoid the massive range of Thomas the Tank Engine & Chuggington. Because of this, I made all my decorations by myself :)
We'll start off with the biggest decoration of all - the pinata! I made this bad boy with 3 pieces of large poster cardboard, some tissue paper for decoration, masking tape to hold it all together, some string to tie it up with & glue. I miscalculated my measurements so I had to tape some extra cereal boxes lying around to add length & I used a toilet roll for the chimney of the train.
Here is the before decoration & finalized.
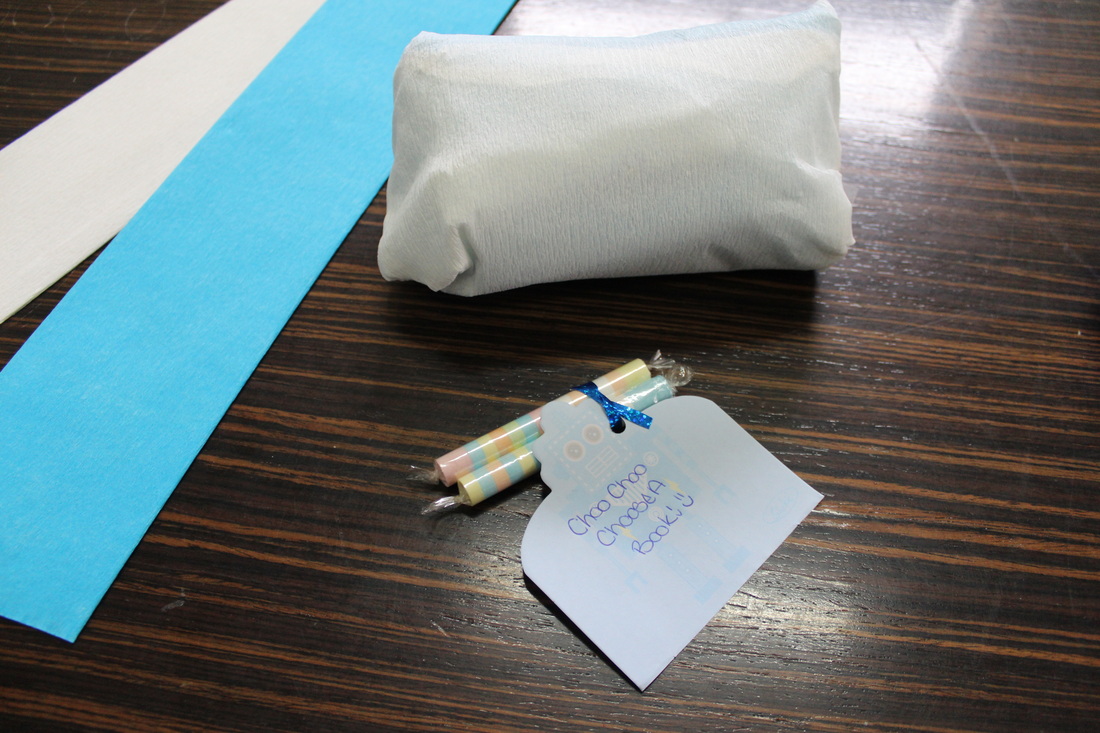
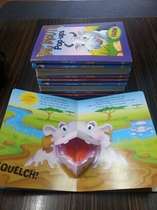
For the games we are doing simple ideas because the little ones will all be around the 2-5 year old mark. So we have chosen the pinata & a small game of pass the parcel. I was browsing through the shops the other day searching for pass the parcel goodies that fell into the theme of trains but couldn't find anything I liked that would suit both boys and girls. Just as I was about to leave I came across these pop up books which were on sale for only $1 each! I thought they were perfect but way too heavy for little ones to pass around 15 pop-up board books so I improvised. In each layer of the pass the parcel there is 2 candy rolls & a little note tied around them that reads "Choo Choo Choose A Book! :)" They will then at the end of the game go to the table where the books will be set for them to choose one of the 3 types of pop-up books available.
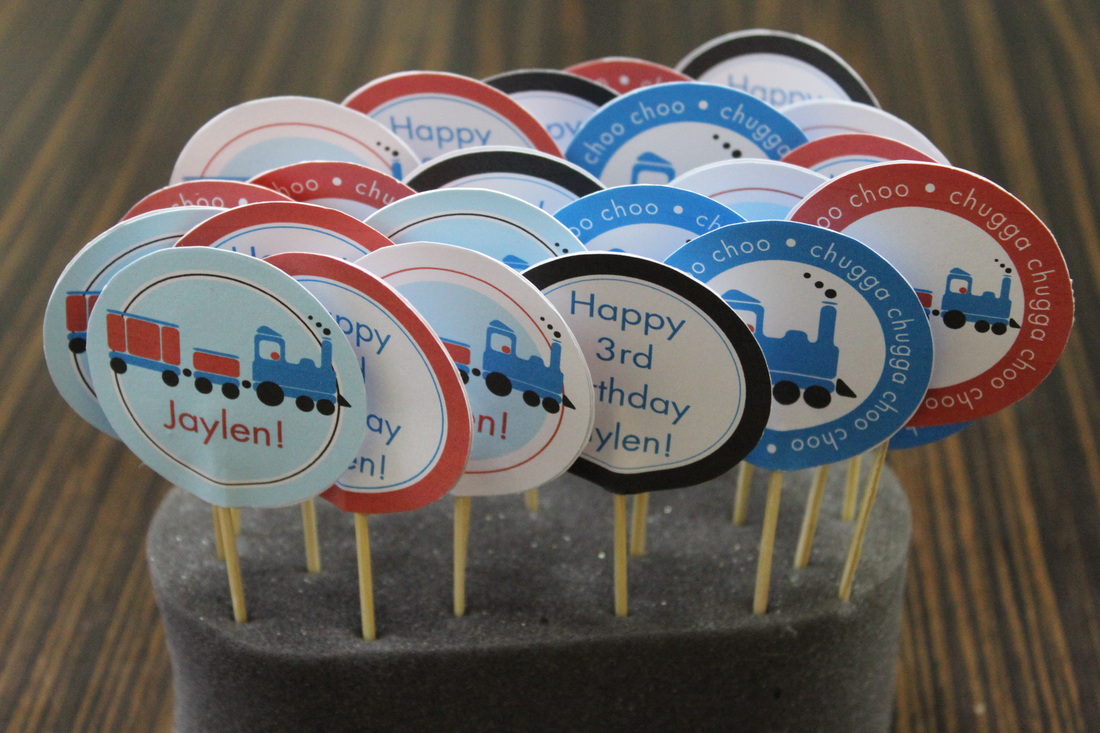
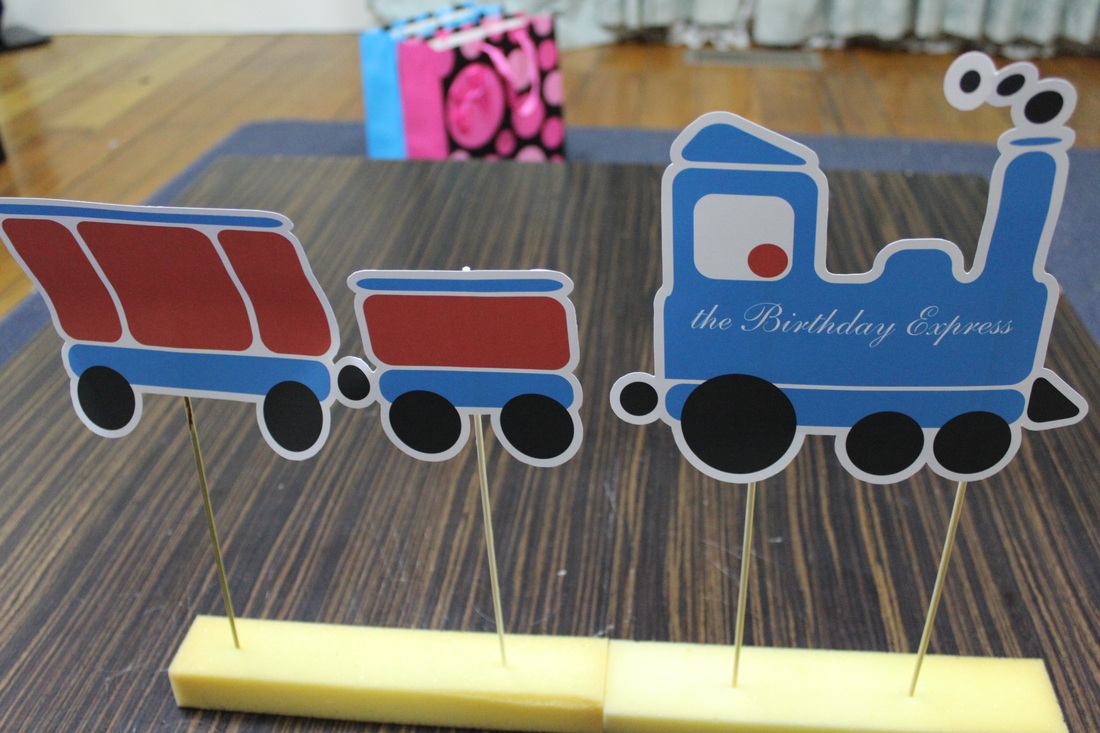
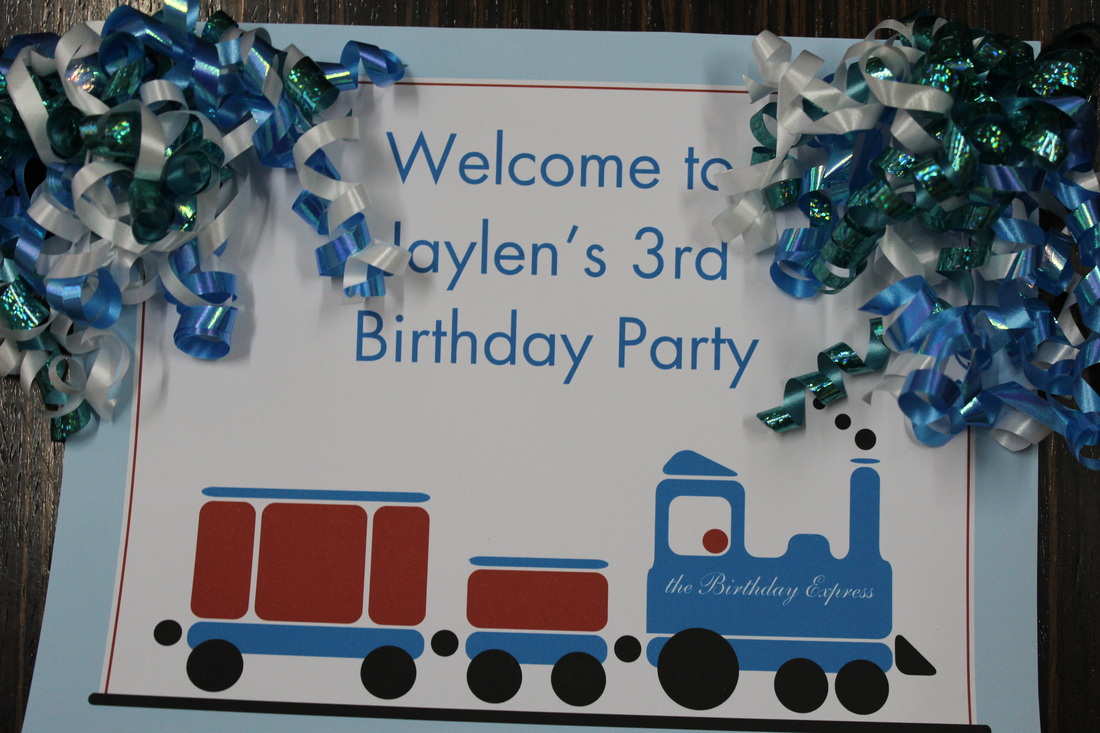
And below we have his cupcake toppers made with a 2" circle cutter & a sheet of printed circle designs. All you need to do is cut out what you would like on the top of the cupcake then use a hot glue gun (or any sturdy glue) to stick the cut out onto a toothpick or lollypop stick for you to place into the cupcake after you have iced them. Next is a decoration I made to stick into the ground - It is just a train cutout hot glued to some bamboo skewers. And on the end we have the front door sign - something simple, just a paper printout with some ribbon decorations.
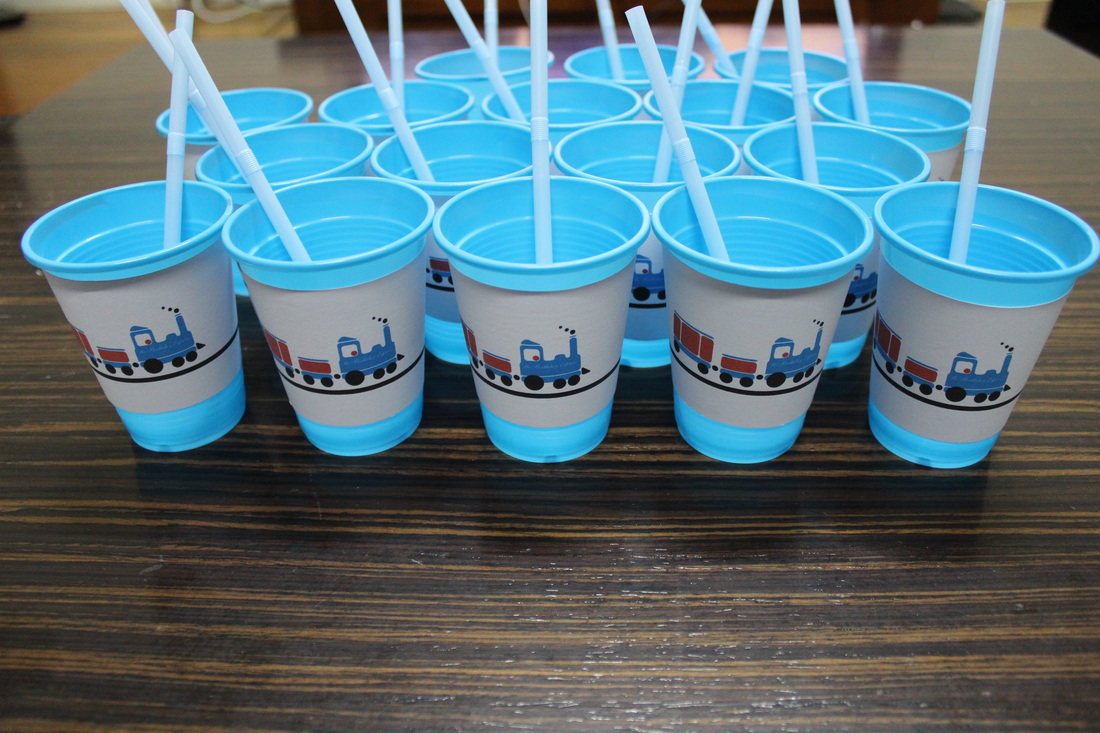
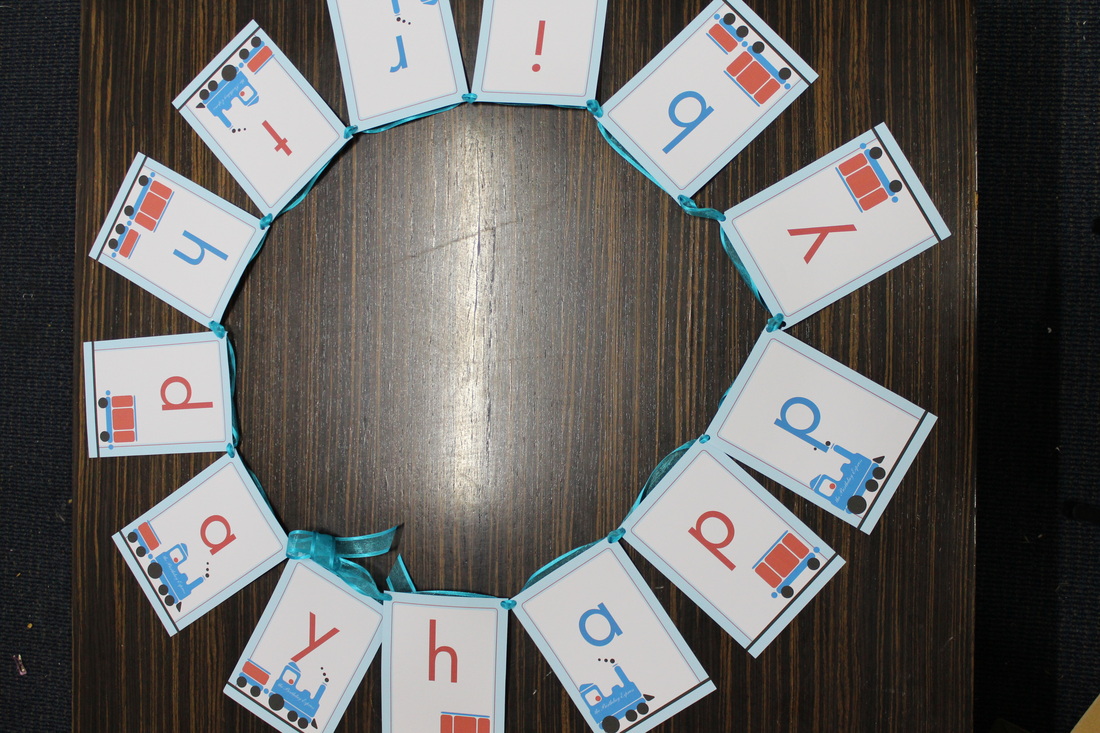
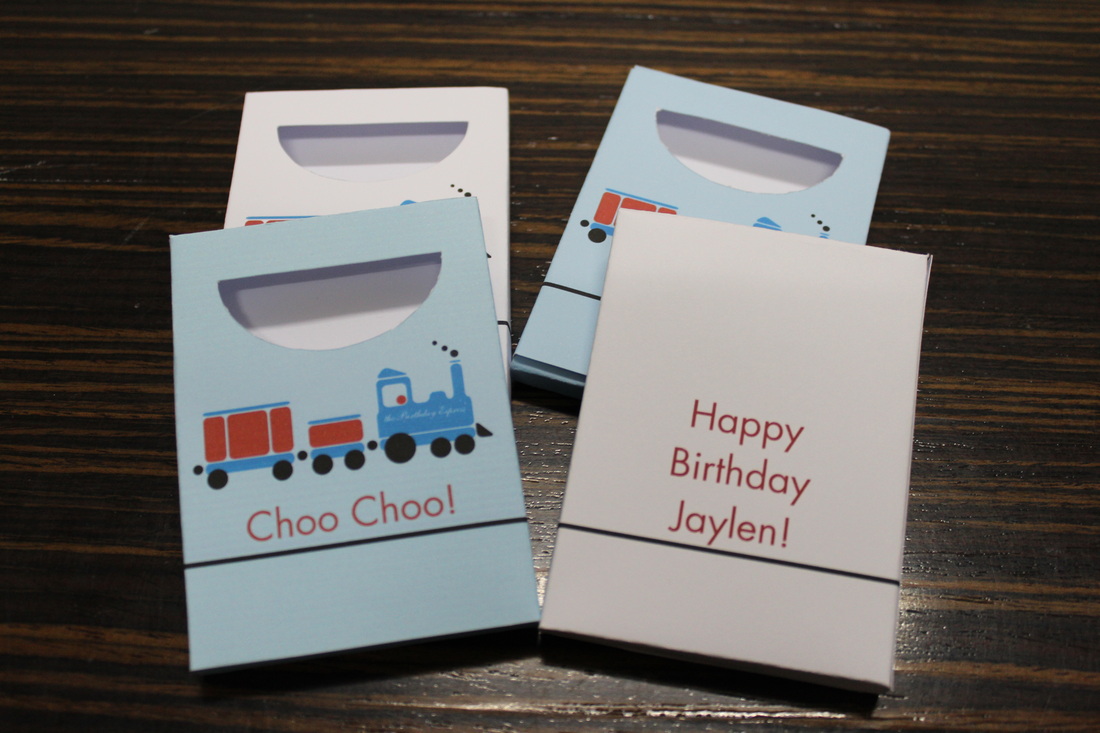
Below is the self explanatory stuff - the cups, crayon boxes, colouring in sheets, party hats, the birthday banner & the snack containers.
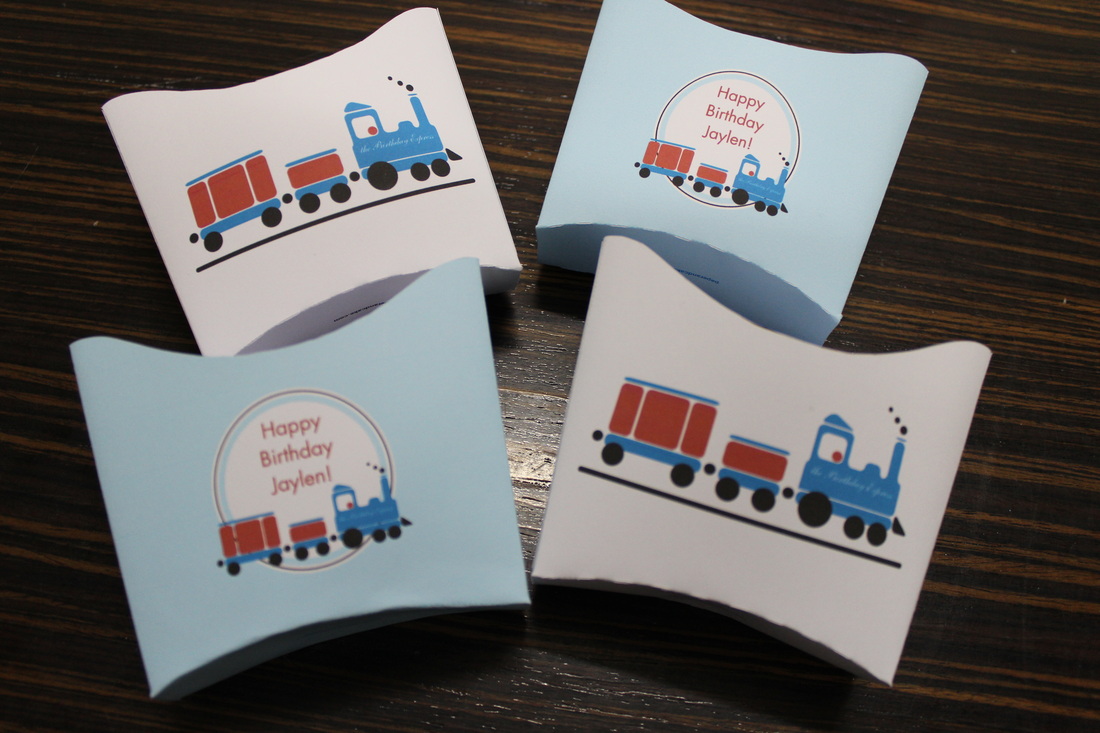
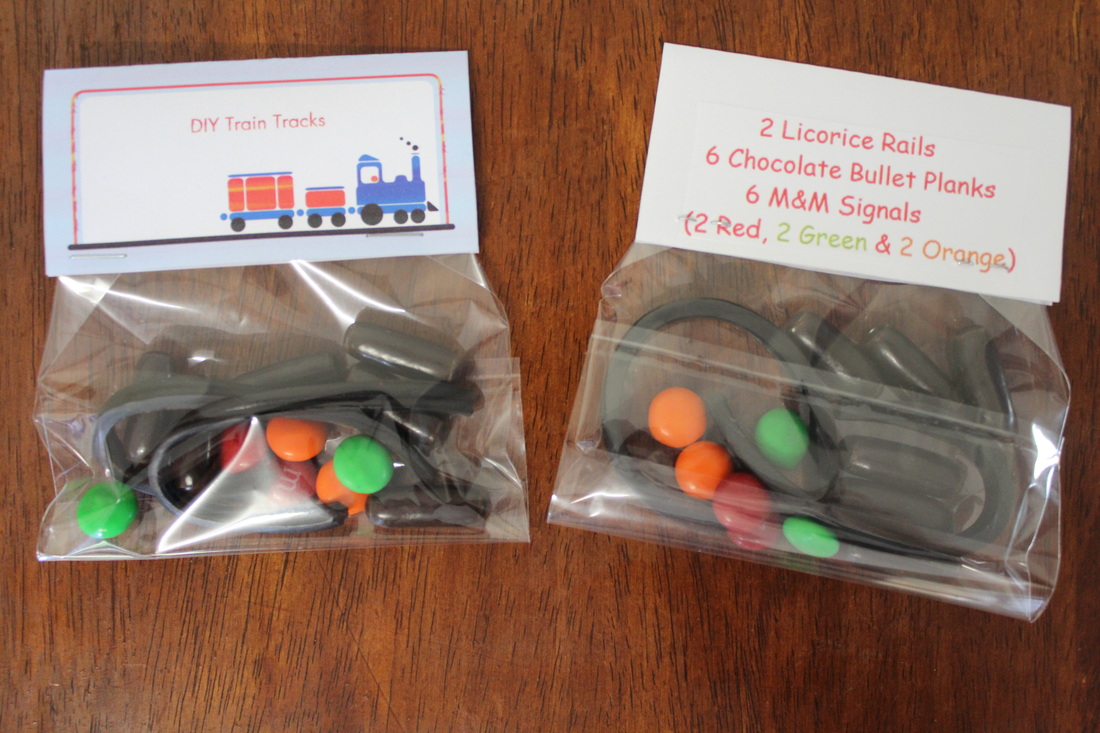
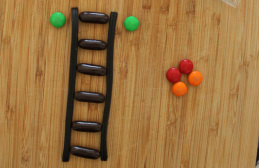
Finally the take home party favours - I kept it train themed & made a DIY Train Track Candy Bag - It contains 6 m&m's, 2 strips of licorice and 6 chocolate coated licorice bullets. They look like the picture on the left & get set up like the one on the right.
The rest of the party remains a surprise until after the party on the 16th of February. :) There is loads of food fun & decoration ideas to share with you after that! :)
 Back to school for most of you is fast approaching & some have even already started! For me, well, the kidlets aren't quite old enough for school or school lunches but that doesn't stop me from sharing some healthy ideas for lunch snacks. Today I ventured into the sweet & savory taste testing again while trying to think of new tasty nibbles to serve at Mr J's birthday party next month. And well, this is what I came up with.
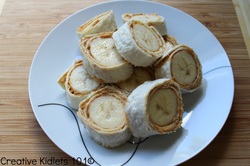
Banana & peanut butter wraps are exactly what they say they are but with a scrumptious taste you would not expect. They are just as simple as making any other wrap or sandwich but give a new look & taste to the every day lunch box. To make these neat treats you simply spread peanut butter onto a sheet of pita bread (or wrap bread - whatever you prefer to call it) then place a peeled banana onto the peanut butter covered bread, you then proceed to roll up the banana in the wrap then slice it into little wrap rounds - it's as easy as that. They are perfect for lunch boxes & snacks on the go.
With CK101 giving you a little inspiration & motivation to get creative today - sugary snacks will be a thing of the past!
|


 RSS Feed